// How to prepare images for use online
All art will need to be in JPG format and no larger than 1200 pixels wide or tall.
1. How to name your art file:
artistName_artPieceName_medium_size.jpg
for example:
SamAdam_ShadowInSpain_OilOnCanvas_36x48.jpg
If it’s not an art image, name it something recognizable but include your name first.
for example:
SamAdam_opening_reception_001.jpg
2. How to reduce your image file to 1200×1200 pixels:
Using photoshop:
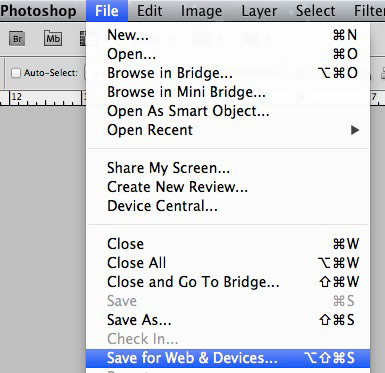
Open the file in photoshop.
Select Save for web.
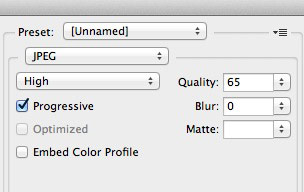
Select JPEG format in the top right of the window. Set the compression quality to about 65 %
Set the size at the bottom right to no wider or taller than 1200 pixels. That means setting which ever side is the longest, set that side to 1200. that will make sure no side will be longer than 1200 pix.
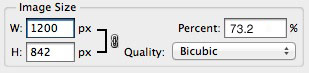
Now just click the save button and make sure you save it in the correct folder. Important ad the letters “sm” for small to the end of your file name
for example:
SamAdam_ShadowInSpain_OilOnCanvas_36x48_sm.jpg
Without photoshop:
If you don’t have photoshop you can use Preview. You can find Preview in your applications folder or in your Applications dock (usually at the bottom of your screen.
![]()
Open your image in Preview. Adjust size in the tool menu.
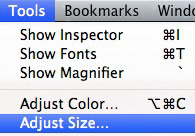
In the adjust size window Set the size no wider or taller than 1200 pixels. That means setting which ever side is the longest, set that side to 1200. that will make sure no side will be longer than 1200 pix. then click OK

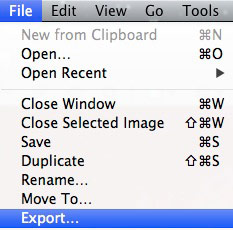
Now export the file. go to File > Export
Make sure you name your file correctly. Ad the letters “sm” (for small) to the end of your file name
for example:
SamAdam_ShadowInSpain_OilOnCanvas_36x48_sm.jpg
Now make sure you save the file in the folder you want it in.
You are now ready to use your images online, on your website or mailchimp.